Oh my gosh, let me tell you about my obsession with crispy Japanese fried chicken! That perfect crunch when you bite into it? The way the juices just burst in your mouth? Absolute magic. I still remember the first time I tried making it at home – total disaster. The chicken came out soggy, the oil temperature was all wrong, but wow did I learn fast!
Now, after years of tweaking (and maybe burning a few batches), I’ve nailed down the secrets to that restaurant-quality crispiness we all crave. The key? Potato starch – trust me, it makes all the difference. And that marinade? Just wait till you smell the ginger and garlic working their magic. This isn’t just fried chicken – it’s a crispy, juicy, flavor-packed experience that’ll have you licking your fingers clean. 
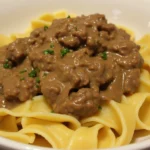
Why You’ll Love This Crispy Japanese Fried Chicken
Okay, let me count the ways this chicken will rock your world:
- That CRUNCH: The potato starch coating fries up so crispy you’ll hear it crackle when you bite in – just like your favorite izakaya spot!
- Juicy inside: Unlike some fried chicken that dries out, the thigh meat stays incredibly moist and tender.
- Quick to make: Just 30 minutes of marinating (perfect for prepping sides) and you’re frying.
- Authentic flavor: The sake-soy-ginger combo gives it that real Japanese taste without fancy ingredients.
- Forgiving recipe: Even if your frying skills aren’t perfect yet, this chicken comes out amazing.
Seriously, once you try this method, you’ll never go back to regular fried chicken again! You can find more great recipes here.
Ingredients for Crispy Japanese Fried Chicken
Gather these simple ingredients – you probably have most already! The magic is in how we use them:
- 500g chicken thighs: Bone-in, skin-on for maximum juiciness (cut into bite-sized pieces)
- 1 cup potato starch: The secret weapon for that signature crunch (cornstarch works in a pinch)
- 2 tbsp soy sauce: Regular or light – just not sweet teriyaki sauce!
- 1 tbsp sake: Or substitute with mirin if that’s what you’ve got
- 1 tsp ginger: Freshly grated – none of that powdered stuff
- 1 tsp garlic: Minced fine so it coats every piece
- 1/2 tsp salt: Just enough to enhance all the flavors
- 1/4 tsp black pepper: Freshly cracked if you’re feeling fancy
- Oil for frying: Neutral oil like canola or vegetable works best
See? Nothing weird or hard to find – just simple ingredients transformed into something extraordinary! If you want to see more of my cooking adventures, check out my Pinterest page.
Equipment You’ll Need
Don’t worry – you don’t need fancy gadgets for this crispy magic! Just grab:
- A deep pan or pot: Something sturdy that can hold about 2 inches of oil
- Candy thermometer: Trust me, knowing your oil temp makes ALL the difference
- Mixing bowl: For that glorious marinade (I use my favorite blue ceramic one)
- Tongs or chopsticks: For flipping those golden pieces safely
- Paper towels: Laid out on a plate to drain excess oil
That’s it! Now let’s get frying!
How to Make Crispy Japanese Fried Chicken
Alright, let’s dive into the good stuff – turning those simple ingredients into golden, crunchy perfection! I’ve learned through trial and error (mostly error at first) that these steps make all the difference between soggy disappointment and that perfect karaage crunch.
Step 1: Marinate the Chicken
First, grab your favorite mixing bowl – I’m partial to my big yellow one with the chipped rim. Whisk together the soy sauce, sake, ginger, garlic, salt and pepper until they’re best friends. Now here’s my secret: pat your chicken pieces dry with paper towels first! Wet chicken won’t soak up all that flavorful goodness. Toss them in the marinade until every nook and cranny is coated, then let them hang out for at least 30 minutes. No cheating – this is when the magic starts happening!
Step 2: Coat with Potato Starch
Time for the crunch-maker! Dump your potato starch into a shallow bowl or plate. I like to work in batches – about 4-5 pieces at a time. Shake off excess marinade (but not too much – we want flavor!) and roll each piece in the starch, pressing gently to make sure it sticks. Pro tip: let them sit for 5 minutes after coating – this helps the starch really adhere for maximum crispiness.
Step 3: Fry to Perfection
Heat your oil to 170°C (340°F) – this is where that thermometer earns its keep! Carefully lower in a few pieces at a time – don’t crowd the pan or they’ll steam instead of fry. I usually do 5-6 minutes per batch, flipping halfway when they’re golden brown. Listen for that happy sizzle! Drain on paper towels and resist eating them all immediately (hardest part). The first bite of that crispy, juicy chicken? Absolute heaven! 
Tips for the Best Crispy Japanese Fried Chicken
After burning more batches than I’d like to admit, here are my golden rules for perfect chicken every time:
- Potato starch is non-negotiable: It creates those irresistible glass-like shards of crispiness that cornstarch just can’t match.
- Oil temperature is everything: Keep it steady at 170°C – too hot burns the coating, too low makes it greasy.
- Dry before you fry: Pat chicken dry before marinating AND after coating with starch – moisture is the enemy of crunch!
- Fry in small batches: I know it’s tempting to cook it all at once, but overcrowding drops the oil temp fast.
- Let it rest: Resist cutting into it immediately! A 2-minute rest lets the juices redistribute.
Follow these, and you’ll have chicken so crispy it could wake the neighbors!
Serving Suggestions
Oh, the fun part – dressing up your crispy masterpiece! My absolute favorite way is with a big bowl of steamed rice (the juices soak in perfectly) and lemon wedges for that bright zing. For special nights, I’ll whip up some Japanese mayo for dipping – just mix mayo with a splash of rice vinegar and a tiny bit of garlic powder. Simple shredded cabbage makes a refreshing side too – the crunch plays so nicely with the chicken!
Storage & Reheating Instructions
Okay, confession time – leftovers rarely happen in my house because we devour this chicken immediately! But if you’re disciplined enough to save some, here’s how to keep that crunch: store cooled pieces in an airtight container (I use my trusty glass one) for up to 2 days. To reheat, skip the microwave – it’ll turn soggy. Instead, pop them in a 180°C (350°F) oven or air fryer for 3-4 minutes until crispy again. Pro tip: a quick spritz of oil before reheating brings back that fresh-fried magic!
Nutritional Information
Now, let’s be real – we’re not eating fried chicken for diet points! But here’s the scoop on what you’re enjoying (because knowledge is power, right?). One serving of this crispy Japanese fried chicken clocks in at about 350 calories – mostly from that glorious golden crust and juicy thigh meat. You’re looking at 25g of protein to keep you satisfied, with 20g carbs from the potato starch coating. The sodium comes mainly from the soy sauce marinade, so if you’re watching that, you could try low-sodium soy sauce. Remember – these numbers can vary based on your exact ingredients and how much oil the chicken absorbs during frying. But honestly? Totally worth every delicious bite!
FAQ About Crispy Japanese Fried Chicken
I’ve gotten so many questions about this recipe over the years – here are the ones that pop up most often:
Can I substitute the sake? Absolutely! If you don’t have sake, mirin works beautifully (just reduce the sugar elsewhere). No mirin? A tablespoon of dry white wine or even chicken broth will do in a pinch.
What if I don’t have potato starch? While potato starch gives the best crunch, cornstarch makes a decent substitute. The texture will be slightly different, but still delicious!
Can I bake instead of fry? You can, but you won’t get that signature crispiness. If you must bake, spray the coated chicken generously with oil and bake at 200°C (400°F) until golden.
How do I know when the oil is ready? No thermometer? Drop a small piece of bread in – if it bubbles and turns golden in about 30 seconds, you’re good to go!
Rate This Recipe
Did this crispy Japanese fried chicken make your taste buds dance? I’d love to hear how it turned out! Leave a quick rating below – your feedback helps me create even better recipes for you!